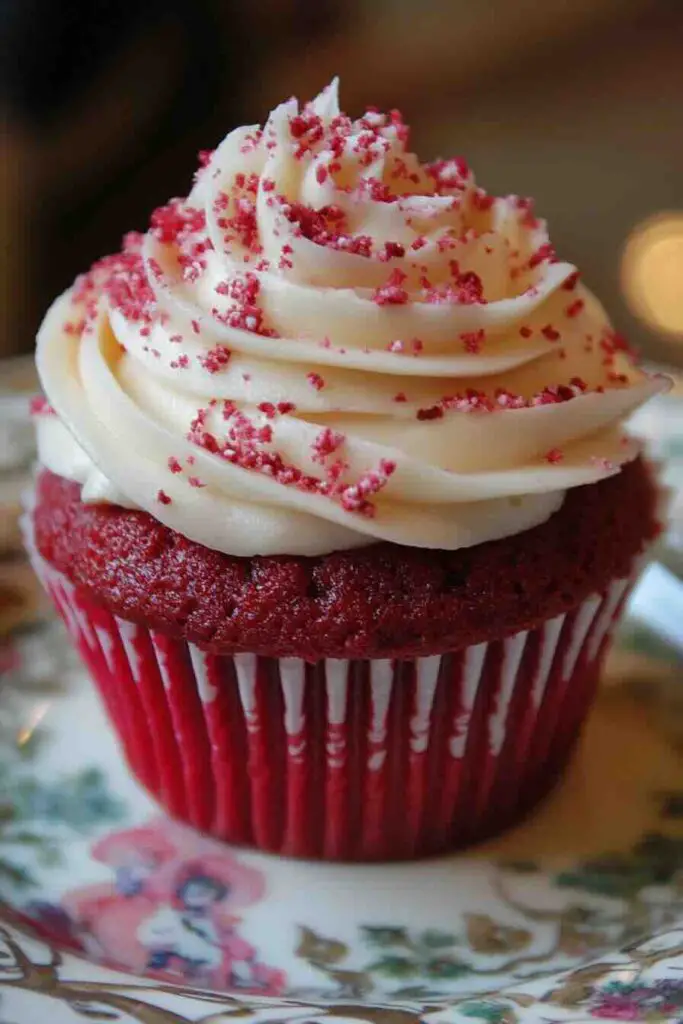
Oh my goodness, let me tell you about red velvet cupcakes! 🧁 You know those desserts that just make your heart skip a beat? Well, these crimson beauties are absolutely to die for. Every time I whip up a batch, I’m reminded of why they’ve become such a beloved classic. Trust me, once you’ve mastered these little gems, you’ll be the star of every gathering!
Why Red Velvet Cupcakes Will Rock Your World
Listen up, fellow baking enthusiasts! If you haven’t jumped on the red velvet bandwagon yet, you’re in for a treat. These aren’t just your average cupcakes – they’re practically tiny works of art that’ll make your taste buds dance with joy.
First off, let’s talk about that incredible texture. Imagine biting into a cloud that’s somehow been transformed into a cupcake. That’s right – we’re talking about a crumb so velvety smooth it practically melts in your mouth. And don’t even get me started on that cream cheese frosting! It’s like a little piece of heaven decided to perch right on top of your cupcake.
The best part? These red velvet delights are incredibly versatile. Whether you’re planning a fancy wedding or just need a pick-me-up on a Wednesday afternoon (hey, no judgment here!), these cupcakes have got your back.
The Secret Sauce Behind Perfect Red Velvet Cupcakes
Now, what makes a red velvet cupcake truly spectacular? Well, it’s all about hitting those perfect notes in harmony. Picture this: a subtle chocolate flavor that doesn’t overwhelm, a hint of vanilla that keeps you coming back for more, and that signature tangy undertone that makes red velvet, well, red velvet!
The Perfect Balance
Here’s the deal: creating that perfect red velvet cupcake is like conducting an orchestra. Every ingredient plays its part, and when they all come together? Pure magic! The cocoa powder needs to whisper rather than shout, while the buttermilk brings that subtle tang that’ll make your taste buds sing.
The Color Game
Let’s address the elephant in the room – that stunning red color! Back in the day, bakers used beet juice to achieve that gorgeous hue. These days, we’ve got food coloring to thank for that Instagram-worthy shade. But remember, folks, we’re not just going for looks here – it’s all about that perfect balance of flavor and visual appeal.
A Trip Down Memory Lane: The Red Velvet Story
Hold onto your aprons, because we’re about to dive into some fascinating history! Red velvet cupcakes aren’t just pretty faces – they’ve got quite the story to tell. Would you believe these beauties have been around since the 1800s? Talk about standing the test of time!
From Humble Beginnings to Culinary Stardom
Initially created as a “velvet cake” to showcase a super-soft crumb texture (hence the name!), this dessert has evolved into the showstopper we know and love today. Fun fact: The Waldorf Astoria hotel played a huge role in making red velvet cake the talk of the town back in the mid-1900s. How’s that for some sweet history?
Modern-Day Love Affair
Fast forward to today, and red velvet has become a global sensation. From fancy bakeries in Paris to cozy cafés in Tokyo, these crimson cupcakes have captured hearts worldwide. And let’s be honest – who can resist that classic combination of rich, red cake topped with creamy, tangy frosting?
Let’s Get Baking: The Ultimate Red Velvet Cupcakes Recipe
Alright, baking buddies, roll up those sleeves because it’s time to create some magic! Here’s everything you’ll need to make these beauties shine.
The Cast of Characters (Ingredients)
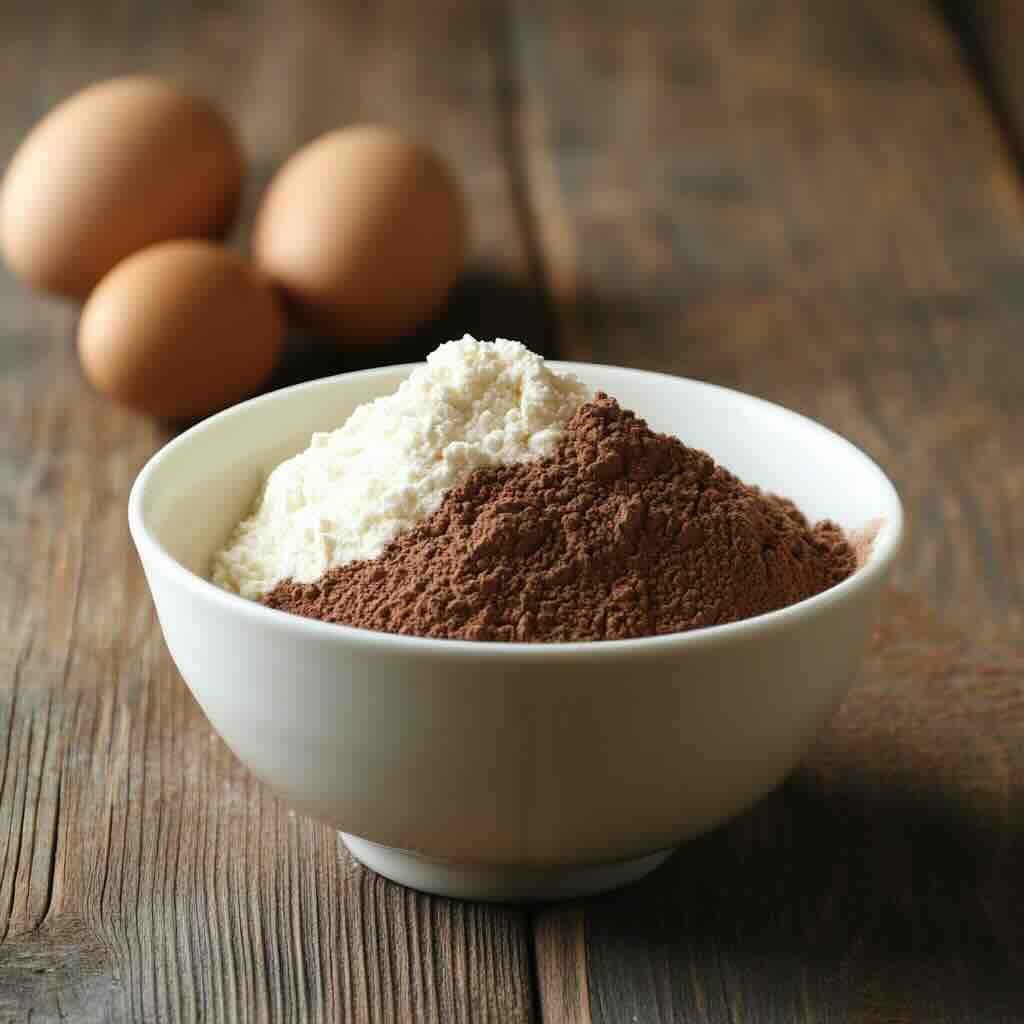
For the Cupcakes:
- 2½ cups cake flour (because we’re fancy like that!)
- 1½ cups granulated sugar
- 2 tablespoons cocoa powder
- 1 teaspoon baking soda
- 1 teaspoon salt
- 2 large eggs (room temperature, pretty please!)
- 1½ cups vegetable oil
- 1 cup buttermilk
- 2 tablespoons red food coloring
- 1 teaspoon white vinegar
- 2 teaspoons vanilla extract
For that Heavenly Frosting:
- 16 oz cream cheese (room temp is crucial!)
- ½ cup unsalted butter (also room temp)
- 4 cups powdered sugar
- 2 teaspoons vanilla extract
- Pinch of salt (trust me on this one)
Your Baking Arsenal (Equipment)
Before we dive in, make sure you’ve got:
- A trusty mixer (stand or hand, both work great)
- Muffin tin (standard size)
- Cupcake liners (the prettier, the better!)
- Cooling rack (patience is a virtue)
- Piping bag and tip (for that professional touch)
The Main Event: Making Your Red Velvet Cupcakes Dreams Come True
Stage 1: Cupcake Magic
- First things first: Preheat that oven to 350°F (180°C). While it’s warming up, line your muffin tin with those cute liners you picked out.
- In one bowl, whisk together your dry ingredients until they’re having a proper party together. Set aside.
- Now, in your mixer bowl, cream together the butter and sugar until they’re light and fluffy – we’re talking about 3-4 minutes of quality time together.
- Add those eggs one at a time, mixing well after each addition. It’s like adding members to a band – everyone needs to blend in perfectly!
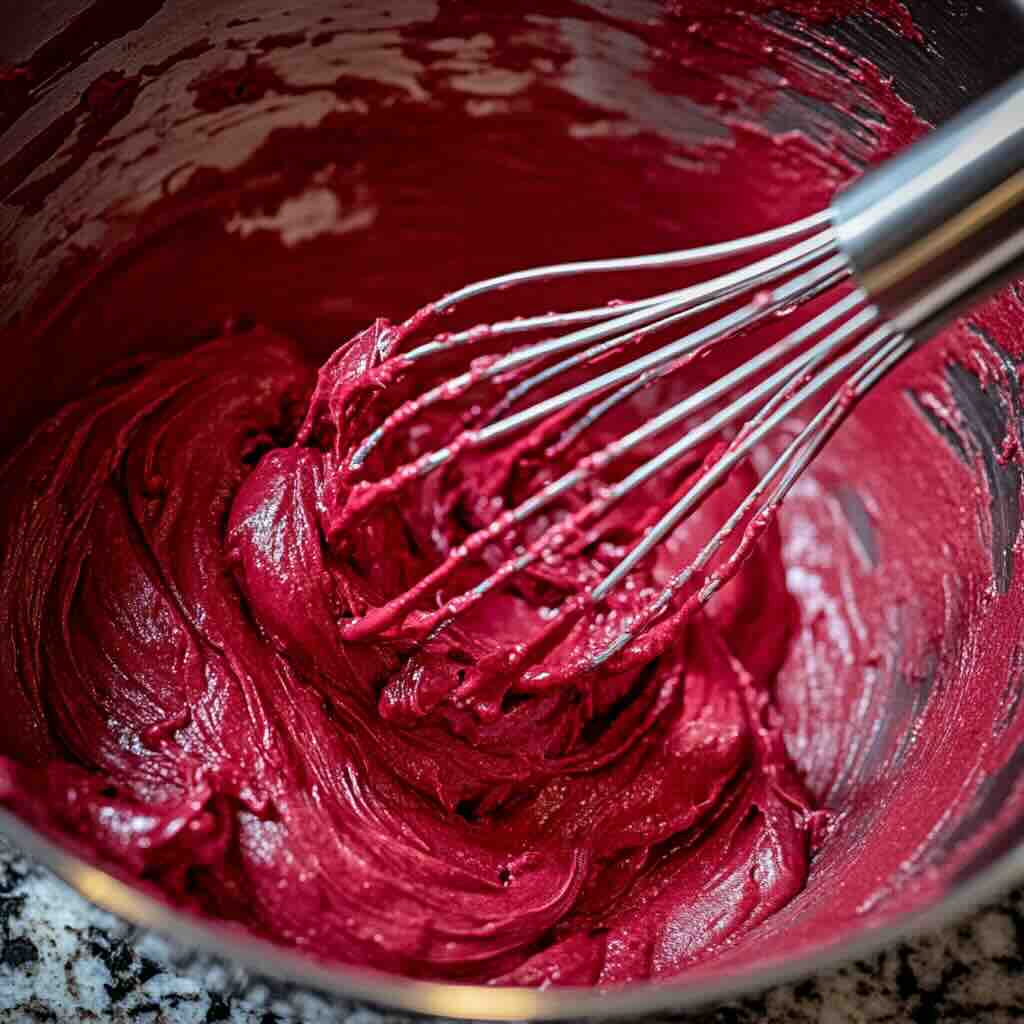
- In goes the oil, buttermilk, vanilla, vinegar, and that all-important red food coloring. Mix until everything’s smooth and gorgeous.
- Here’s where the magic happens: gently fold in your dry ingredients. Remember, we’re not training for an arm-wrestling competition here – be gentle!
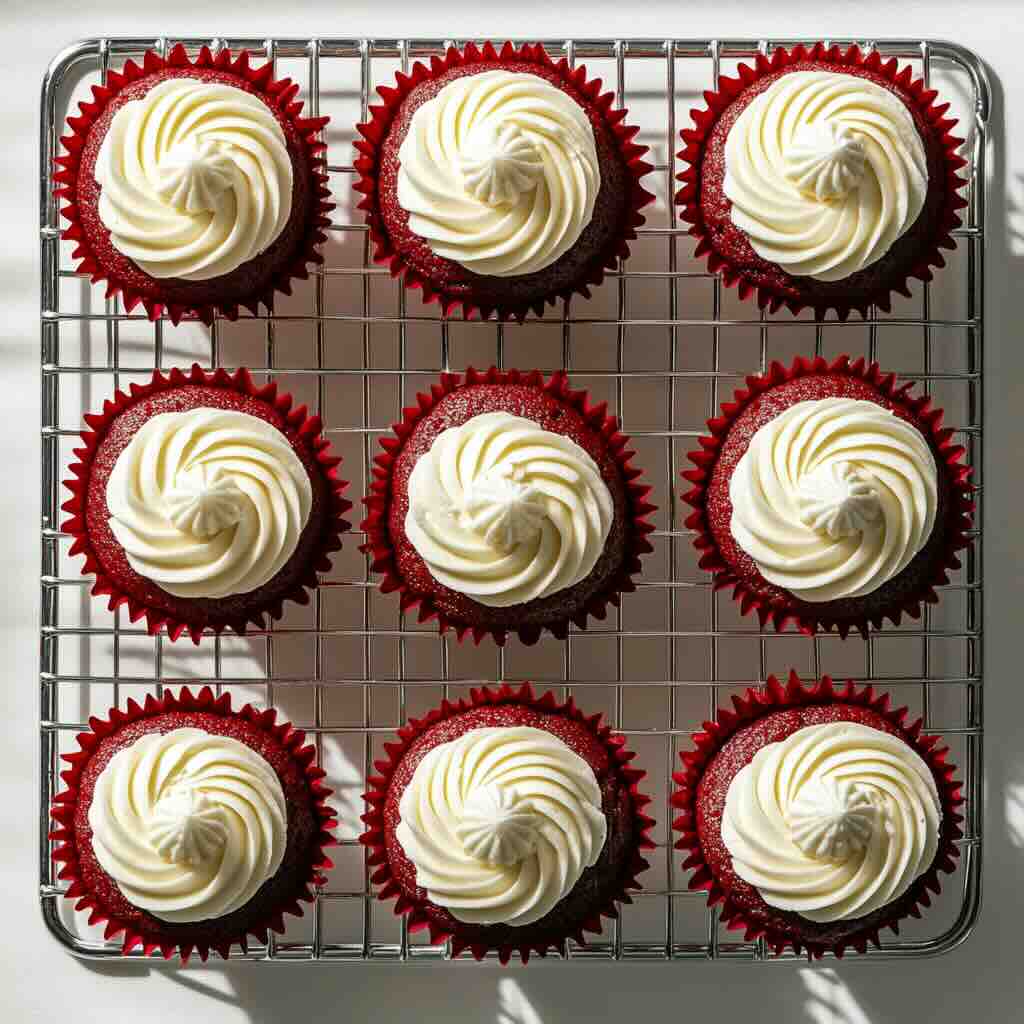
- Fill those cupcake liners about ¾ full. Pop them in the oven and let them do their thing for about 20 minutes.
Stage 2: Frosting Fantastic
While your cupcakes are cooling (and yes, they MUST be completely cool – I learned this the hard way!), let’s make that dreamy frosting:
- Beat the butter until it’s super pale and fluffy.
- Add your cream cheese and mix until they’re best friends.
- Gradually add the powdered sugar (unless you want your kitchen to look like a winter wonderland!).
- Finally, add vanilla and salt, then beat until you’ve got those perfect peaks.
The Art of Knowing When They’re Done
Here’s a pro tip: don’t rely on time alone! Your cupcakes will tell you when they’re ready if you know what to look for. A gentle press on the top should spring back, and a toothpick inserted in the center should come out clean. If you see any batter hanging out on that toothpick, give them a few more minutes to work their magic.
Making Them Your Own: Variations and Toppings
Now, here’s where you can let your creativity shine! While classic cream cheese frosting is traditional (and absolutely divine), why not shake things up a bit?
Fun Twists to Try:
- Add a splash of almond extract to your batter for a nutty surprise
- Core the centers and fill them with chocolate ganache (hello, heaven!)
- Top with fresh berries for a burst of color and flavor
- Sprinkle with edible glitter for some serious sparkle
The Numbers Game: Nutritional Info
Look, I’m not going to sugarcoat it (pun intended!) – these aren’t exactly health food. But life’s all about balance, right? One cupcake comes in at about 392 calories, but every single one of those calories is worth it! If you’re watching your intake, try using low-fat cream cheese in the frosting – it’ll still taste amazing, I promise!
Pro Tips from a Red Velvet Cupcakes Enthusiast
After countless batches (and yes, some failures – we all have them!), here are my top tips for red velvet success:
- Temperature matters! Get those ingredients to room temp before starting. Cold ingredients are like party guests who show up too early – they just mess with the flow.
- Don’t overmix! Mix until the ingredients are just combined. Think of it like introducing people at a party – you want them to mingle, not become best friends.
- If your frosting gets too soft while piping, pop it in the fridge for a few minutes. It’s like giving it a little power nap!
Keeping Your Cupcakes Fresh
These beauties will stay fresh in an airtight container for up to 3 days at room temperature (unfrosted) or in the fridge (frosted). But let’s be real – they rarely last that long in my house! If you need to make them ahead, you can freeze the unfrosted cupcakes for up to 3 months. Just wrap them well and thaw completely before frosting.
FAQs about Red Velvet Cupcakes
What makes red velvet different from chocolate cake?
It’s all about that subtle balance! Red velvet has just a hint of cocoa, plus that signature tanginess from buttermilk and vinegar. Think of it as chocolate cake’s sophisticated cousin!
Can I use natural food coloring?
Absolutely! Beet powder works great, though the color might be more burgundy than bright red. But hey, it’s what’s inside that counts, right?
Help! My cream cheese frosting is too runny!
No worries! Pop it in the fridge for 15-20 minutes, then give it another beat. Works like a charm every time!
Before You Go…
Remember, baking is part science, part art, and a whole lot of love. Don’t be afraid to experiment and make these red velvet cupcakes your own! And hey, if your first batch isn’t perfect, that’s just an excuse to make more, right? 😉
Whether you’re baking these for a special occasion or just because (which is totally valid!), remember that the best ingredient is always a dash of joy. So turn up your favorite tunes, put on that apron, and get ready to create some magic in your kitchen!
Happy baking, friends! And remember, if you need me, I’ll be over here, probably covered in flour and red food coloring, but loving every minute of it! 🧁❤️
P.S. Don’t forget to share your creations – I’d love to see how your red velvet adventures turn out!
Craving more goodness? Check out my recipe for Chocolate Muffins next. It’s just as comforting, indulgent, and easy to make. You’re going to love it! ❤️
Print
Red Velvet Cupcakes Recipe
- Prep Time: 30 minutes
- Cook Time: 20 minutes
- Total Time: 1 hour 50 minutes (including cooling time)
Description
Soft and velvety red velvet cupcakes with a hint of chocolate and vanilla, topped with tangy cream cheese frosting. Perfect for any occasion!
Ingredients
Cupcakes:
- 1 1/3 cups cake flour (or all-purpose flour)
- 1 tbsp cocoa powder, unsweetened
- 1 1/2 tsp baking powder
- Pinch of salt
- 60g (4 tbsp) unsalted butter, softened
- 2/3 cup caster sugar
- 2 large eggs, room temperature
- 1/3 cup vegetable oil
- 1/2 cup buttermilk, room temperature
- 1 tsp vanilla extract
- 1/2 tsp white vinegar
- 1 tbsp red food coloring
Cream Cheese Frosting:
- 1/3 cup unsalted butter, softened
- 170g (6 oz) cream cheese (block), softened
- 1/2 tsp vanilla extract
- 1/8 tsp salt
- 2 1/2 cups powdered sugar, sifted
Instructions
Cupcakes:
- Preheat the oven to 180°C/350°F (160°C fan). Line a 12-hole muffin tin with cupcake liners.
- Sift together the cake flour, cocoa powder, baking powder, and salt in a bowl.
- In a separate bowl, beat the butter with an electric mixer until pale. Add sugar and beat until fluffy.
- Add eggs one at a time, mixing well after each addition.
- Mix in oil, buttermilk, vanilla extract, vinegar, and red food coloring until smooth.
- Gradually fold in the dry ingredients until just combined. Avoid overmixing.
- Divide the batter evenly between cupcake liners, filling each about 3/4 full.
- Bake for 20 minutes, or until a skewer inserted in the center comes out clean. Cool completely on a wire rack.
Frosting:
- Beat the butter until pale and smooth. Add the cream cheese and mix until combined.
- Gradually add powdered sugar, mixing until fluffy. Add vanilla and salt.
- Pipe or spread frosting onto cooled cupcakes.
Notes
- For the best texture, use room-temperature ingredients.
- If frosting is too soft, refrigerate for 30 minutes before piping.
- You can substitute buttermilk with 1/2 cup milk mixed with 3/4 tsp vinegar.
Nutrition
- Calories: 392 kcal
- Sugar: 37g
- Sodium: 93mg
- Fat: 21g
- Saturated Fat: 14g
- Carbohydrates: 48g
- Fiber: 1g
- Protein: 4g
- Cholesterol: 68mg