Introduction
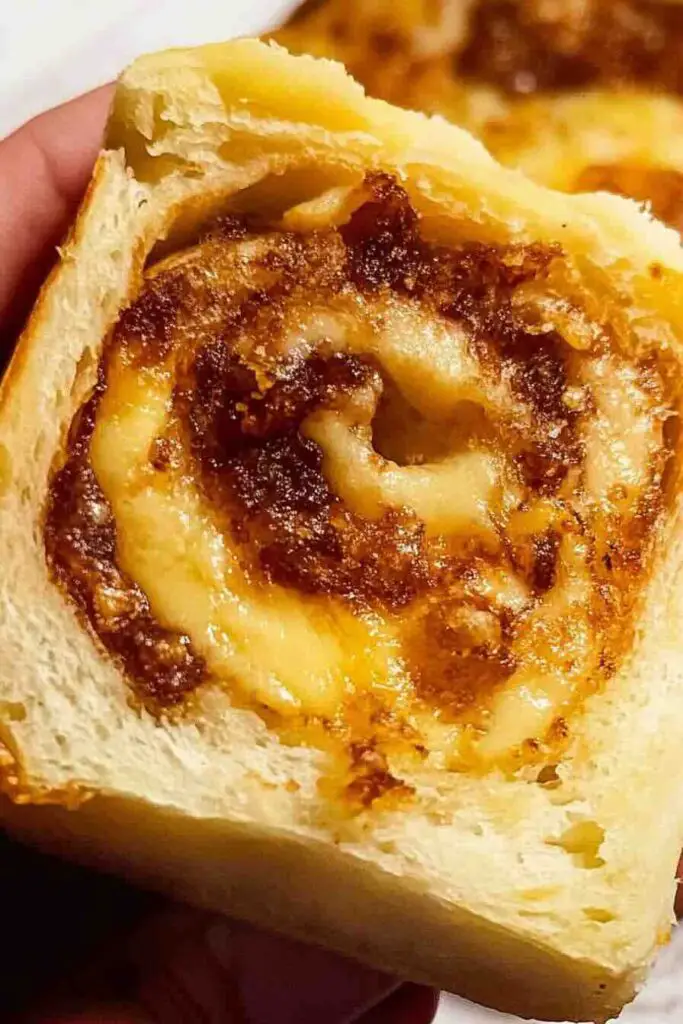
Oh WOW. If you’ve never had a Cheesymite Scrolls before, you’re in for a real treat! Picture this: soft, fluffy, buttery bread, swirled with that salty umami hit of Vegemite, all topped off with golden, melty cheese. It’s Australia in a bite! If you know, you know.
I grew up obsessed with the ones from Bakers Delight—you know, the bakery chain that has somehow mastered the art of getting that perfect scroll texture? But homemade? Oh boy, homemade just hits different. It’s cheaper, fresher, and you get full control over the cheese-to-Vegemite ratio (which, let’s be real, is crucial).
If you’re thinking, But homemade dough is too hard!, trust me—it’s so much easier than it seems. And once you nail it, you’ll never go back to store-bought again.

Why You’ll Love These Cheesymite Scrolls
There are a million reasons to fall head over heels for this recipe, but let’s get straight to the point:
- It’s budget-friendly! A dozen Cheesymite Scrolls at the bakery will set you back around $54 (ouch). Making them at home? About $12.50 for 12 giant, bakery-quality scrolls. Big win.
- The taste is on another level. Bakers Delight? Uses oil. Homemade? We’re going all in with butter, which means softer, richer dough and way better flavor.
- Beginner-friendly dough. Even if you’re new to bread-making, this recipe is forgiving. No fancy techniques, just simple steps.
- Freezes like a dream. Make a batch, freeze the extras, and you’ve got snacks for weeks!
Still not convinced? Let’s talk about what actually makes a good Cheesymite Scroll.
What Makes a Good Cheesymite Scroll?
Not all scrolls are created equal. If you’ve ever had a dry, stiff, or too salty scroll, you’ll know exactly what I mean. So, what separates the elite Cheesymite Scrolls from the meh ones?
Texture & Flavor
- Soft, fluffy bread—chewy, not dry!
- Just the right amount of Vegemite—not too overpowering.
- Melty, golden cheese topping that’s slightly crispy on the edges.
Appearance
- Perfectly risen, with visible swirls.
- No Vegemite “bald spots” (uneven spread = disaster).
- That gorgeous cheese crust that makes you wanna dive in immediately.
Now that we know what we’re aiming for, let’s take a quick trip down memory lane to see how these iconic scrolls came to be.
The Cultural Significance of Cheesymite Scrolls
If you grew up in Australia, you definitely had a Cheesymite Scroll in your lunchbox at some point. These things are iconic. They’re right up there with sausage rolls, fairy bread, and meat pies in the Aussie snack hall of fame.
Why? Because they’re:
- A staple in bakeries and grocery stores.
- A go-to for school lunches and road trips.
- The ultimate combo of salty, cheesy, and carby goodness.
But where did they actually come from?
A Brief History of Cheesymite Scrolls
The Origins
The Cheesymite Scroll is an Aussie take on traditional cheese bread, with a nod to Britain’s Marmite-and-cheese rolls. But it wasn’t until Bakers Delight popularized them that they became a nationwide obsession.
Vegemite’s Role
- Born in the 1920s as Australia’s answer to Marmite.
- Slowly became a national treasure (even though non-Aussies find it deeply confusing).
- The soul of the Cheesymite Scroll—without it, it’s just a cheese roll.
Alright, history lesson over. Let’s get to the fun part: baking!
What You’ll Need for Cheesymite Scrolls
Dough
- 3 ½ cups (525g) bread flour (stronger gluten = softer rolls)
- 2 ¼ tsp instant yeast
- 1 ¼ cups warm milk (activates yeast + softens dough)
- 2 tbsp sugar (balances out the saltiness)
- 1 tsp salt
- 3 tbsp butter (melted)
Filling
- 2 tbsp Vegemite (adjust to taste)
- 3 tbsp softened butter (makes spreading way easier)
- 1 ½ cups cheese (Cheddar, Colby, or Monterey Jack)
Topping
- Extra cheese (because more cheese = better life)
Now, onto the tools!
Equipment Needed
- Stand mixer (or your hands, if you like a workout)
- Rolling pin
- Baking tray
- Pastry brush
- Sharp knife (for clean scroll cuts)
How to Make Cheesymite Scrolls ( Step-By-Step )
1: Make the Dough
- Mix flour, yeast, sugar, and salt in a bowl.
- Add warm milk and melted butter.
- Knead for 8-10 minutes (or until smooth and elastic).
2: First Rise
- Place dough in an oiled bowl, cover, and let rise for 1.5 hours (until doubled).
- Pro tip: If your kitchen’s cold, use the dryer trick—pop the covered bowl in a turned-off dryer for gentle warmth.
3: Roll & Fill
- Punch down the dough, then roll it into a 10×14-inch rectangle.
- Spread butter first, then thinly spread Vegemite (a little goes a long way!).
- Sprinkle cheese evenly over the top.
4: Shape & Cut
- Roll the dough into a tight log (not too tight, or the rolls won’t rise).
- Slice into 12 equal pieces and place them cut-side-up on a tray.
5: Second Rise
- Cover and let them rest for 30 minutes.
6: Bake
- Bake at 180°C/350°F (160°C fan) for 25 minutes.
- Crank the oven up to 200°C/375°F (180°C fan) for a final 10 minutes—this crisps up the cheese!
How to Tell When Cheesymite Scrolls Are Done
Baking is both an art and a science, and when it comes to Cheesymite Scrolls, getting that perfect balance of soft, fluffy interior and golden, cheesy crust is the goal. But how do you really know when they’re done? Here are a few foolproof ways to check.
1. Look for a Golden-Brown Top
One of the most obvious signs of doneness is the color. The cheese on top should be beautifully golden, slightly crispy around the edges, and bubbling in the center. If the cheese looks pale or hasn’t melted completely, give it a few extra minutes in the oven.
2. Check the Bottom
Even if the top looks perfect, the bottom tells the real story. A properly baked scroll should have a slightly firm, golden base. If the bottoms still feel soft or look pale, they may need a bit more time in the oven. You can gently lift one to check without ruining the batch.
3. Tap Test for a Hollow Sound
This is an old baker’s trick! Lightly tap the bottom of a scroll—if it sounds hollow, it’s a good sign that it’s baked through. If it still sounds dense or heavy, the inside may still be slightly undercooked.
4. Internal Temperature Check
For those who love precision, using a food thermometer is the ultimate way to be sure. The internal temperature of fully baked bread should be around 190°F (88°C). If it’s below that, let them bake for a few more minutes.
5. Test for Firmness
Freshly baked bread should have a slight spring when pressed gently. If the scrolls feel too soft or deflate when touched, they likely need more time. However, don’t overbake them—too long in the oven will dry them out!
By keeping an eye on these details, you’ll never have to second-guess whether your Cheesymite Scrolls are ready. Just be prepared for the delicious, cheesy aroma to make waiting really hard!
Variations & Toppings
Cheesymite Scrolls are already a flavor-packed delight, but why stop at the classic version? There are so many ways to tweak and elevate this recipe, whether you want to change up the cheese, add more fillings, or play around with toppings. Here are some fun variations to try!
1. Cheese Variations
While Cheddar is the most common choice, don’t be afraid to experiment with different types of cheese to create your perfect scroll.
- Mozzarella – Gives you a gooey, stretchy pull when warm.
- Parmesan – Adds a nutty, extra-savory sharpness.
- Gouda – Smooth and slightly sweet, perfect for a more balanced flavor.
- Swiss Cheese – Mild and melty, with a subtle tang that pairs well with Vegemite.
A mix of cheeses can add depth and make each bite even more irresistible!
2. Filling Additions
If you want to take your Cheesymite Scrolls to the next level, try adding a few extra ingredients inside the swirl.
- Bacon Bits – A smoky, salty touch that pairs beautifully with Vegemite.
- Caramelized Onions – Sweetness balances out the umami of Vegemite and cheese.
- Chopped Sun-Dried Tomatoes – Adds a tangy, slightly sweet contrast.
- Cream Cheese & Vegemite Combo – For a smoother, slightly milder taste.
Just be mindful not to overload the filling—too much can make the dough difficult to roll and affect baking.
3. Topping Ideas
The cheese topping is already a winner, but you can add even more texture and flavor with a few creative extras:
- Garlic Butter Glaze – Brush the scrolls with melted garlic butter right after baking for extra richness.
- Sesame or Poppy Seeds – Sprinkling these on top before baking adds a slight crunch and a nutty flavor.
- Extra Cheese Crust – Before baking, press extra shredded cheese around the edges of the scrolls to create a crispy, cheesy “halo.”
With these variations, your Cheesymite Scrolls will never be boring!
Nutritional Insights About Cheesymite Scrolls
While Cheesymite Scrolls are a delicious treat, it’s always good to know what you’re eating. These rolls are packed with protein, calcium, and energy—making them a satisfying snack—but they do come with a bit of a sodium hit. Let’s break it down.
1. Calories Per Scroll
Each Cheesymite Scroll contains approximately 250–300 calories, depending on the amount of cheese and Vegemite used. If you make larger scrolls, expect the calorie count to be a little higher.
2. Protein & Carbs
Thanks to the cheese and flour, each scroll provides around 9-12 grams of protein and a hearty dose of carbohydrates for energy. If you’re an active person, these make a great pre- or post-workout snack!
3. Sodium Levels
Vegemite is naturally high in sodium, which means these scrolls can be quite salty. If you’re watching your salt intake, you can:
- Use a little less Vegemite for a milder flavor.
- Choose low-sodium cheese to balance it out.
- Pair your scroll with a glass of water to offset the saltiness!
4. Healthier Substitutions
If you want to make these scrolls a bit healthier, consider:
- Swapping white flour for whole wheat to add fiber.
- Using reduced-fat cheese for a lighter version.
- Spreading Vegemite more thinly to lower the sodium.
While these aren’t exactly health food, they’re definitely better than a lot of store-bought alternatives—and way more satisfying!
Pro Tips & Tricks for the Best Cheesymite Scrolls
Want to make sure your Cheesymite Scrolls turn out absolutely perfect every time? Keep these expert tips in mind!
1. Use Fresh Yeast for the Best Rise
If your yeast is old or inactive, your dough won’t rise properly, leaving you with dense, flat scrolls. To test yeast freshness, mix a little with warm water and sugar—if it doesn’t foam up within 10 minutes, it’s time for new yeast!
2. Prevent Soggy Scrolls
Excess butter or uneven spreading of Vegemite can lead to soggy spots. Make sure to:
- Spread a thin, even layer of Vegemite.
- Avoid using too much butter in the filling.
- Let the scrolls cool on a wire rack to prevent moisture buildup.
3. Getting the Perfect Swirls
To ensure those beautiful, even layers, roll the dough tightly but not too tight—otherwise, they won’t rise properly during baking. If the dough feels sticky, lightly flour your rolling pin.
4. Freezing Dough vs. Baked Scrolls
- To freeze the dough, roll and slice the scrolls, then freeze them on a tray before baking. When ready to use, thaw overnight and bake as usual.
- To freeze baked scrolls, let them cool completely, then store in airtight bags for up to 3 months.
Storage & Health Tips
1. Storing Fresh Scrolls
Once cooled, Cheesymite Scrolls can be stored in an airtight container at room temperature for up to 3 days. If you like them warm, pop them in the microwave for 10–15 seconds before eating.
2. Freezing for Longer Storage
Wrap each scroll individually in plastic wrap or place them in a freezer bag. When ready to eat, reheat them in a preheated oven at 180°C (350°F) for 10 minutes—this keeps them crisp and fresh!
3. Making a Healthier Version
Want to enjoy these without the guilt?
- Use whole wheat flour for extra fiber.
- Reduce cheese quantity slightly.
- Swap in a light butter alternative.

FAQs About Cheesymite Scrolls
How long do Cheesymite Scrolls last?
At room temperature, they stay fresh for 3 days. If frozen, they can last up to 3 months.
Can I make these without Vegemite?
Yes! Try Marmite for a similar flavor, or skip it entirely and just make cheesy scrolls.
What’s the best way to reheat them?
Microwave for 15 seconds for a soft texture or bake at 180°C (350°F) for 10 minutes for a crispier finish.
Before You Go…
If this Cheesymite Scrolls guide has you inspired, check out my recipes for Thai Curry Chicken Skewers or Chicken Parmigiana. They’re the perfect pairings to take your meals to the next level. Happy cooking!
Print
Cheesymite Scrolls Recipe
- Prep Time: 15 minutes
- Cook Time: 30 minutes
- Total Time: 2 hours 20 minutes (includes rising time)
- Yield: 12 1x
Description
Cheesymite Scrolls are the ultimate Aussie bakery treat! These soft, fluffy rolls are packed with melty cheese and a rich Vegemite swirl, making them the perfect savory snack. This homemade version is budget-friendly, tastes better than store-bought, and stays fresh for days. Whether you’re a longtime Vegemite lover or just curious, you’ll fall in love with these cheesy, umami-packed scrolls!
Ingredients
For the Dough:
- 3 ½ cups (450g) bread flour
- 2 ¼ tsp (7g) instant yeast
- 1 cup (250ml) warm milk
- 2 tbsp (30g) sugar
- 1 tsp salt
- 3 tbsp (45g) butter, softened
For the Filling:
- 2 tbsp (40g) Vegemite
- 2 tbsp (30g) salted butter, melted
- 2 cups (200g) shredded cheese (Cheddar, Colby, or Monterey Jack)
For the Topping:
- ½ cup (50g) extra shredded cheese
Instructions
- Make the Dough: In a large bowl, combine flour, yeast, sugar, and salt. Add warm milk and softened butter, then mix until a shaggy dough forms.
- Knead & First Rise: Knead the dough for about 8–10 minutes until smooth and elastic. Place it in a greased bowl, cover, and let it rise for 1.5 hours or until doubled in size.
- Roll & Fill: Punch down the dough and roll it into a rectangle (about 12×18 inches). Spread melted butter and Vegemite evenly over the surface, then sprinkle with shredded cheese.
- Shape & Cut: Roll the dough tightly into a log, then slice into 12 equal scrolls using a sharp knife. Arrange them on a parchment-lined baking tray.
- Second Rise: Cover the scrolls and let them rise again for 30 minutes.
- Bake: Preheat the oven to 350°F (180°C). Sprinkle extra cheese on top and bake for 25 minutes. Increase the temperature to 375°F (190°C) and bake for another 10 minutes until golden.
- Cool & Serve: Let the scrolls cool slightly before enjoying them warm and cheesy!
Notes
- If you’re new to Vegemite, start with a thinner layer and adjust to taste.
- For an extra crisp topping, broil the scrolls for the last 2 minutes of baking.
- These scrolls freeze well! Wrap individually and store for up to 3 months.
- Reheat frozen scrolls in an oven at 350°F (180°C) for 10 minutes.
Nutrition
- Calories: 280
- Sugar: 3g
- Sodium: 450mg
- Fat: 12g
- Saturated Fat: 7g
- Carbohydrates: 35g
- Fiber: 2g
- Protein: 10g
- Cholesterol: 30mg