Introduction
Ah, potatoes—the ultimate comfort food! But let’s talk about the rockstar of all potato dishes: Hasselback potatoes. If you haven’t made these yet, buckle up because you’re in for a crispy, golden, and absolutely irresistible ride.
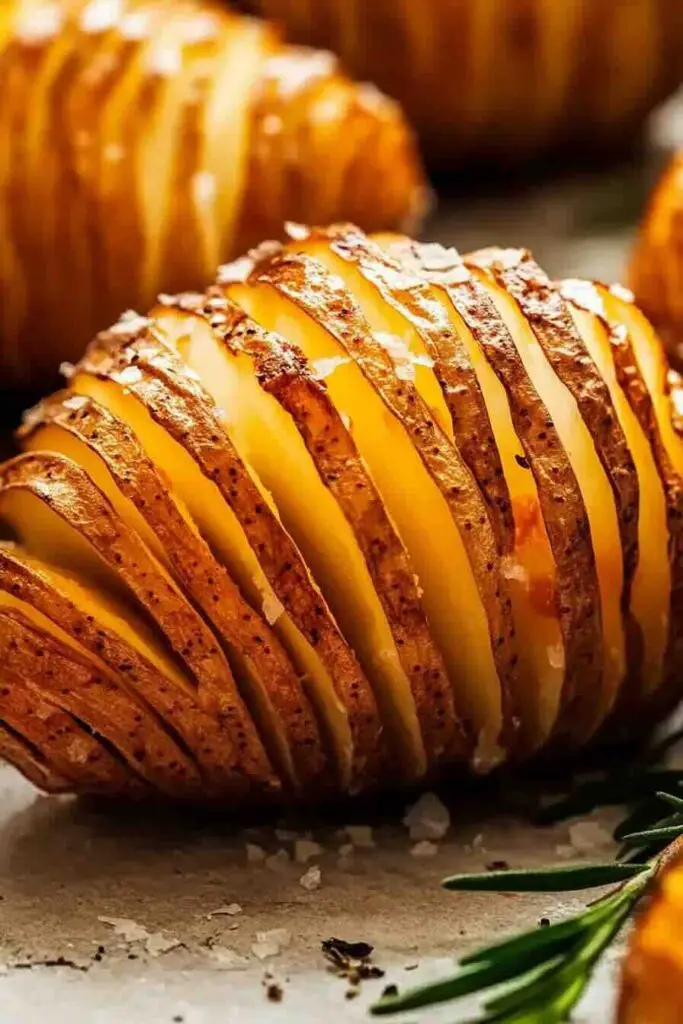
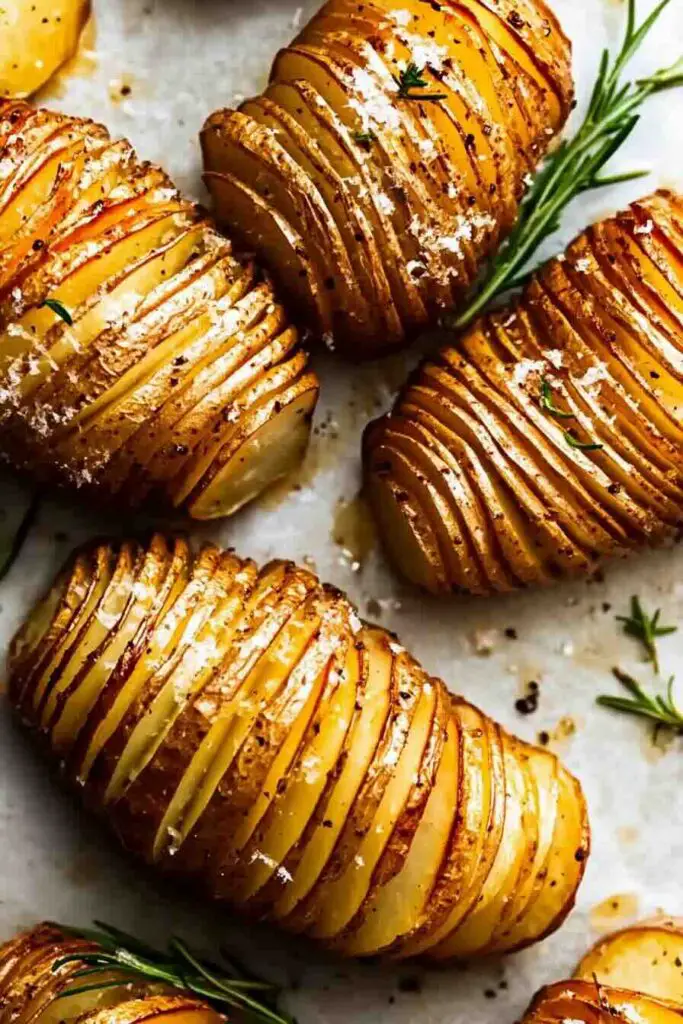
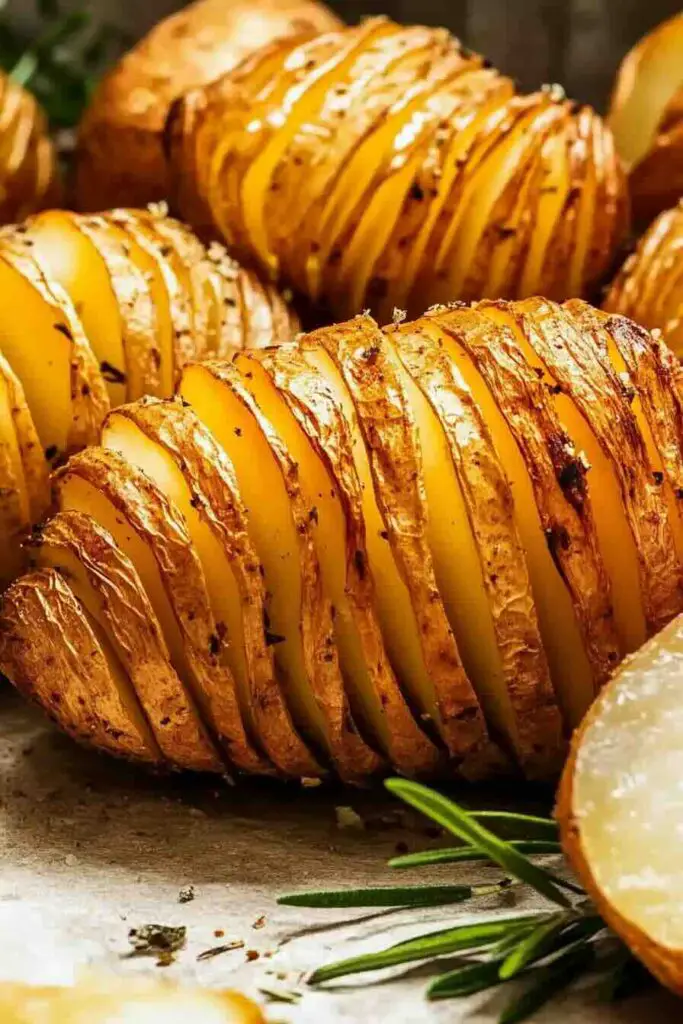
Hasselback potatoes are like the fancy cousin of baked potatoes. They’re thinly sliced (but not all the way through), fanned out, and roasted until they’re crispy on the outside and buttery soft inside. This technique not only makes them stunning to look at, but also maximizes flavor absorption.
First developed in Sweden, these beauties have made their way onto tables worldwide. Why? Because they’re easy, versatile, and downright delicious. Whether you keep it classic with salt and butter or go wild with toppings like cheese, garlic, and bacon, Hasselback potatoes always deliver.
So, if you’re ready to master this dish, stick with me. I’ll walk you through everything—choosing the right spuds, perfecting the cut, and unlocking all the secrets to crispy, golden perfection.
Reasons You’ll Love This Recipe
If you need a reason (or five) to make Hasselback potatoes, let me convince you:
- Crispy edges, soft centers – The contrast is chef’s kiss perfection.
- Minimal ingredients, maximum flavor – You likely have everything you need already.
- Fancy-looking but simple – These look restaurant-worthy but require no special skills.
- Customizable to your heart’s content – Butter, cheese, garlic, bacon—you name it!
- Perfect for any occasion – Weeknight dinner? Yes. Impressing guests? Absolutely.
Seriously, once you try them, they’ll become a go-to side dish. Let’s break down exactly how to make them perfect every single time.
What Makes a Good Hasselback Potato?
The Importance of Fanning
You want those slices to fan out so each section gets crispy. The trick? Thin, even slices and a little patience while they bake. Fanning also allows oil and seasonings to seep into every crevice, giving you maximum flavor.
The Role of Thin Slices
You’re aiming for about 2mm per slice. Why so thin? Because thinner slices = better crisping. And don’t cut all the way through! Leave about 1cm at the base intact so the potato holds together.
Basting & Oil Absorption
Frequent basting is the golden ticket. Every 10 minutes, brush on more oil or butter to keep those edges crisp and prevent dryness. The choice between butter and olive oil? Butter gives richness; olive oil enhances crispiness. Pro tip: use both.
The Cultural Significance of Hasselback Potatoes
Hasselback potatoes are more than just a pretty side dish—they’re a Swedish culinary icon. Originating in the 1950s at Stockholm’s Hasselbacken restaurant, they were an instant hit. Over the years, variations have popped up worldwide. Today, you’ll find them in gourmet restaurants and home kitchens alike, proving their universal appeal.
Different cultures have put their own spin on them—some add parmesan, others wrap them in bacon, and in some places, truffle oil is the star ingredient. Regardless of how they’re made, one thing remains true: Hasselback potatoes are a timeless favorite.
The History of Hasselback Potatoes
Fun fact: Hasselback potatoes were created by a culinary student named Leif Elisson. While training at Hasselbacken restaurant in Sweden, he had a eureka moment—what if you sliced a potato into thin sections before roasting? The result? A crispy, golden masterpiece that became a Swedish staple.
Since then, the recipe has evolved. Some people add cheese, some drizzle garlic butter, while others take things up a notch with bacon and truffle oil. What started as a simple side dish has transformed into a global favorite, proving that sometimes, the simplest ideas are the most brilliant.
Ingredients
Essential Ingredients
- Potatoes – Russet, Yukon Gold, or Maris Piper are best.
- Olive Oil or Butter – Essential for crispiness and flavor.
- Salt – Enhances taste and helps draw out moisture.
Optional Flavor Enhancers
- Garlic – Roasted garlic takes these to another level.
- Rosemary or Thyme – Adds aromatic goodness.
- Parmesan Cheese – A crispy, cheesy crust? Yes, please.
Equipment Needed
- Sharp Knife – Precision is key.
- Chopsticks or Wooden Spoons – Helps prevent slicing through.
- Basting Brush – Essential for even oil distribution.
- Baking Tray – Ensures even roasting.
Step-By-Step Instructions
Step 1: Prepping the Potatoes
Wash and dry your potatoes—no one wants dirt in their masterpiece. If they wobble, slice a tiny piece off the bottom to keep them steady.
Step 2: Cutting the Hasselback Slices
Place chopsticks on either side of the potato to prevent slicing all the way through. Carefully cut thin, even slices about 2mm apart.
Step 3: First Bake (30 Minutes)
Brush with a little oil and bake at 200°C/400°F for 30 minutes. This helps the slices start to fan out.
Step 4: Basting & Second Bake (40 Minutes)
Now the magic happens. Brush generously with butter, sprinkle salt, and bake for another 40 minutes, basting every 10 minutes.
Step 5: Final Crisping (10–15 Minutes)
Crank up the heat to 220°C/425°F for the last 10–15 minutes. This step ensures those edges get ultra crispy.
Variations & Toppings
One of the best things about Hasselback potatoes is how incredibly versatile they are. While they’re delicious on their own with just a little salt and butter, the real magic happens when you start experimenting with different toppings and seasonings. Whether you prefer classic flavors, rich and indulgent toppings, or something completely out of the box, there’s a version for everyone.
Classic Variations
If you love traditional flavors, you’ll appreciate these simple yet delicious variations.
- Cheesy Hasselback Potatoes – Adding cheese is one of the easiest ways to elevate these crispy potatoes. You can sprinkle grated cheddar, parmesan, or gruyère over the potatoes during the final 10 minutes of baking. This allows the cheese to melt beautifully and create a crispy, golden topping. For extra indulgence, mix the cheese with a bit of garlic butter before brushing it over the potatoes.
- Garlic Butter Hasselbacks – Garlic and butter are a match made in heaven, and they work exceptionally well with Hasselback potatoes. Simply melt butter with minced garlic, a pinch of salt, and a little fresh parsley, then baste the potatoes every 10 minutes during baking. The garlic infuses into every slice, creating an aromatic and rich flavor that pairs perfectly with the crispy edges.
- Herb-Infused Hasselbacks – Fresh herbs like rosemary, thyme, and oregano add a wonderful depth of flavor. You can either finely chop the herbs and mix them with melted butter before brushing them onto the potatoes, or you can tuck whole sprigs between the slices before baking. As they roast, the herbs release their oils and fragrance, making each bite more flavorful.
Creative & Gourmet Twists
For those who want to take things up a notch, these creative variations bring bold flavors and a gourmet touch to classic Hasselback potatoes.
- Loaded Hasselbacks – If you love a good loaded baked potato, this variation is for you! Once your potatoes are fully baked, top them with crispy bacon bits, shredded cheddar cheese, and a dollop of sour cream. Add chopped chives or green onions for a fresh, slightly sharp contrast. This version is perfect for game nights, barbecues, or any time you’re craving a fully loaded, flavor-packed side dish.
- Truffle Hasselbacks – For a luxurious twist, drizzle the finished potatoes with truffle oil and sprinkle with parmesan cheese. Truffle oil adds an earthy, aromatic depth that takes these potatoes from simple to sophisticated. This version pairs well with steak, roasted chicken, or a fancy holiday meal.
- Spicy Hasselbacks – If you love a bit of heat, try dusting the potatoes with smoked paprika, cayenne pepper, or chili flakes before baking. You can also drizzle them with a spicy sriracha or chipotle mayo after they come out of the oven. The combination of heat and crispiness makes for an irresistible snack or side dish.
- Mediterranean Hasselbacks – Inspired by Mediterranean flavors, this variation includes crumbled feta cheese, sun-dried tomatoes, and black olives. Once the potatoes are fully baked, sprinkle these toppings over the top and drizzle with a little olive oil and fresh lemon juice. The result? A tangy, flavorful dish that pairs beautifully with grilled meats or fresh salads.
Best Toppings & Seasonings
There’s no limit to how you can customize Hasselback potatoes. Here are some other tasty toppings to consider:
- Melted cheese – Mozzarella, gouda, blue cheese, or pepper jack.
- Crunchy toppings – Crispy bacon, fried shallots, toasted nuts, or breadcrumbs.
- Sauces & drizzles – Pesto, garlic aioli, ranch dressing, or honey mustard.
- Fresh garnishes – Chopped parsley, basil, cilantro, or dill for added color and flavor.
With so many possibilities, you can switch up the toppings based on your mood, the occasion, or what’s available in your kitchen. Whether you keep it simple or go all out, one thing is certain—Hasselback potatoes will always steal the show!
Nutritional Insights About Hasselback Potatoes
Hasselback potatoes may be an indulgent side dish, but they also have plenty of nutritional benefits, especially when made with the right ingredients. Let’s take a closer look at what makes them a great addition to your meal and how you can make them even healthier.
Caloric Breakdown
A basic Hasselback potato made with olive oil, salt, and butter contains:
- Calories: Around 200–250 per medium potato
- Carbohydrates: Approximately 37–40g per serving
- Protein: About 4g per potato
- Fat: Varies depending on toppings (butter, cheese, or oil add more)
- Fiber: Roughly 4g per serving
While potatoes are naturally higher in carbs, they are also rich in fiber, especially when you leave the skin on. The fiber helps with digestion and keeps you feeling full longer.
Health Benefits of Potatoes
Despite their reputation for being carb-heavy, potatoes actually provide a lot of essential nutrients, including:
- Vitamin C – A powerful antioxidant that supports the immune system.
- Potassium – Helps regulate blood pressure and fluid balance.
- B Vitamins – Important for energy production and brain function.
Plus, when roasted instead of deep-fried, potatoes remain a much healthier option than French fries or potato chips.
How to Make Hasselback Potatoes Healthier
If you want to enjoy Hasselback potatoes while keeping them on the lighter side, here are a few tips:
- Use less butter – Opt for a light drizzle of olive oil instead.
- Skip heavy toppings – Stick to herbs, lemon zest, and garlic for flavor.
- Try an air fryer – Air frying reduces oil usage while maintaining crispiness.
- Pair with lean protein – Serve alongside grilled chicken or fish for a balanced meal.
By making small tweaks, you can enjoy these crispy, flavorful potatoes guilt-free!
Pro Tips & Tricks
Even though Hasselback potatoes are relatively simple to make, a few tricks can take them from good to unbelievably great. Here’s everything you need to know to achieve perfect results every time.
Perfecting the Cutting Technique
- Use a very sharp knife – A dull knife will crush the potato instead of slicing cleanly.
- Don’t rush the cutting – Take your time to ensure even, thin slices.
- Use chopsticks or wooden spoons – Placing them on either side of the potato prevents you from cutting all the way through.
Achieving the Best Texture
- Fan out the slices manually – If your slices aren’t opening up during baking, gently separate them with a fork.
- Bake low and slow, then crank the heat – The best texture comes from a long, slow bake followed by a high-heat finish.
- Baste frequently – The more you baste, the crispier and more flavorful your potatoes will be.
Avoiding Common Mistakes
- Cutting too deep – This causes the potato to fall apart during baking.
- Not using enough oil or butter – Dry potatoes won’t crisp up properly.
- Skipping the final high-heat bake – Without it, you’ll miss out on that golden crunch.
Master these techniques, and you’ll be serving up restaurant-quality Hasselback potatoes in no time!
Storage & Reheating Tips
Storing Leftovers
- Let the potatoes cool completely before storing them.
- Place them in an airtight container and store in the fridge for up to 3 days.
- Avoid stacking them, as this can make them soggy.
Best Reheating Methods
- Oven (best method): Bake at 200°C/400°F for 10 minutes.
- Air Fryer: Crisp them up at 180°C/350°F for 5–7 minutes.
- Microwave (not recommended): They’ll soften but won’t be crispy.
FAQs About Hasselback Potatoes
What is the Hasselback technique?
It’s a method of slicing a potato into thin, even sections while keeping the base intact, allowing for maximum crispiness.
Can I make Hasselback potatoes ahead of time?
Yes! Par-bake them for 30 minutes, then finish baking just before serving.
Can I freeze Hasselback potatoes?
Not recommended. The texture becomes mushy when reheated.
With all these tips, you’re now fully equipped to master Hasselback potatoes. Give them a try and enjoy every crispy, golden bite!
Before You Go…
Craving more goodness? Check out my recipe for Chicken Burger or Chicken Marsala next! It’s just as comforting, indulgent, and easy to make. You’re going to love it! ❤️ Happy cooking!
Don’t forget to subscribe for more mouthwatering recipes straight to your inbox!
Print
Hasselback Potatoes Recipe
- Prep Time: 10 minutes
- Cook Time: 70 minutes
- Total Time: 1 hour 20 minutes
- Yield: 4 1x
Description
This Hasselback Potatoes Recipe delivers crispy, golden edges and a soft, buttery inside! Simple to make yet impressively elegant, these accordion-sliced potatoes are perfect as a side dish for any meal. With just a handful of ingredients and a little oven magic, you’ll have a restaurant-quality dish that’s packed with flavor. Customize them with cheese, garlic butter, or your favorite toppings for an extra indulgent twist!
Ingredients
Essential Ingredients:
- 4 large Yukon Gold or Russet potatoes
- 3 tbsp olive oil (or melted butter)
- 1 tsp sea salt
- ½ tsp black pepper
Optional Flavor Enhancers:
- 2 cloves garlic, minced
- 2 tbsp melted butter (for basting)
- 2 tbsp grated parmesan or cheddar cheese
- 1 tsp smoked paprika
- 1 tsp fresh rosemary or thyme, chopped
Instructions
- Preheat the oven to 400°F (200°C) and line a baking sheet with parchment paper.
- Prepare the potatoes by washing and drying them thoroughly. Leave the skins on for extra crispiness.
- Slice the potatoes into thin, even sections, stopping about ¼ inch from the bottom so they remain intact. To make this easier, place chopsticks or wooden spoons on either side of the potato to prevent slicing all the way through.
- Brush with olive oil or melted butter, ensuring it seeps into the slices. Season with salt and pepper.
- Bake for 30 minutes, uncovered.
- Remove from the oven and baste the potatoes with more butter or oil. If using garlic, herbs, or spices, mix them into the butter before brushing onto the potatoes.
- Bake for another 30-40 minutes, basting every 10 minutes for extra crispiness.
- For extra golden edges, increase the temperature to 425°F (220°C) during the last 10-15 minutes of baking.
- Remove from the oven, sprinkle with parmesan cheese if using, and let cool slightly before serving. Enjoy!
Notes
- For even crispier potatoes, baste them frequently with butter or oil while baking.
- Cheese should be added in the last 10 minutes of baking to prevent burning.
- Best potatoes to use: Yukon Gold, Russet, or Maris Piper—these hold their shape and crisp up beautifully.
- Make ahead: You can par-bake the potatoes for 30 minutes, then finish baking when ready to serve.
- Storage: Keep leftovers in an airtight container in the fridge for up to 3 days. Reheat in the oven at 400°F (200°C) for 10 minutes for the best texture.
Nutrition
- Calories: 250
- Sugar: 2g
- Sodium: 400mg
- Fat: 10g
- Saturated Fat: 4g
- Carbohydrates: 40g
- Fiber: 4g
- Protein: 4g